Using MySQL, Quick Answers
Introduction
This Workshop deals with various topics that are more practical in focus and relate to more practical problems that readers of these workshops have had and have e-mailed me about. Normally if there is a blindingly obvious omission from one of the workshops, I'll just go back and add it to that page. Sometimes however there is a question that someone has asked that is either too specific a problem or goes beyond that which is suitable for a novice to get involved with. Thus I have decided to create this 'Appendix' page where I can put all the leftover stuff.
Contents
Securing MySQL
Requires knowledge of database admin, and deleting data.
The default MySQL settings are pretty secure, but there are still a few things that the paranoid sys admin may wish to do. This involves manipulating the data in the internal 'mysql' database which is used to manage the permissions on your server ONLY DO THIS IF YOU ARE COMFORTABLE WITH MYSQL and probably before a server goes into a production environment.
Removing the 'test' database
Let us start with something easy though. Certain distributions of MySQL install a 'test' database with pretty much unrestricted access and thus it is a good idea to remove it. As the root or admin user we are going to DROP the database.
mysql> DROP DATABASE test;
Query OK, 0 rows affected (0.03 sec)
A bit about the 'mysql' database.
Every MySQL server uses a database called 'mysql' to store the permission that we can set. MySQL permissions work on a hierarchy of
- Host from which connections are allowed
- The User requesting access
- The Databases that can be used
- Access to individual Tables within a database
- Access to individual Columns within a table
These are stored in corresponding tables like so:
| columns_priv | Relates to individual column privileges within a table |
| db | Relates to privileges for the individual databases |
| func | Relates to privileges for functions |
| host | Relates to privileges for the access from hosts |
| tables_priv | Relates to individual column privileges for a table |
| user | Relates to privileges for the access by users |
In each table privileges for uses are set by 'Y' or 'N' in the appropriate column for a privilege. eg the Select Privilege on a vworksDB database.
mysql> SELECT db.Host, db.Db, db.User, db.Select_priv
    -> FROM db WHERE (db.DB = "vworksDB");
+-------------+------------+-----------+-------------+
| Host        | Db         | User      | Select_priv |
+-------------+------------+-----------+-------------+
| localhost   | vworksDB   | vworks    | Y           |
NOTE: There's is also a table for storing function privileges In this workshop I'm only going to look at the db and user privileges. For more detailed information read the MySQL manual.
Removing Permissions from a Database
As we have already DROPed the 'test' database we also need to remove the permissions associated with this database. This is done by manipulating the data in the db table of the 'mysql' database. Again as the admin user switch to that database.
mysql> \u mysql
Database changed
Next review the permissions (db.Host, db.User) held in the db table for the 'test' database (in the db.Db field)
mysql> SELECT db.User, db.Host, db.Db
    -> FROM db
    -> WHERE (db.Db LIKE 'test%');
+------+-----------+------------+
| User | Host      | Db         |
+------+-----------+------------+
|      | %         | test       |
|      | %         | test\_%    |
+------+-----------+------------+
2 rows in set (0.00 sec)
Also note that there was no user associated with these databases and that access is available from any host (signified by the MySQL wildcard '%'). You can now safely DELETE these data rows.
mysql> DELETE FROM db
    -> WHERE (db.Db LIKE 'test%');
Query OK, 1 row affected (0.05 sec)
We also want to ensure that no other database can allow any user to connect or indeed a user to connect from any host. Thus we need two other statements to restrict access to named users and hosts by DELETing wildcard and blank entries from Host and User .
mysql> DELETE FROM db
    -> WHERE (db.Host = "%");
Query OK, 1 row affected (0.01 sec)

mysql> DELETE FROM db
    -> WHERE (db.User = "");
Query OK, 0 rows affected (0.00 sec)
Note: There are of course occasions when you would wish to allow remote hosts to connect to the server. Permissions can be set to do this on an individual basis (see Part 6), but does illustrate why this is best done on a fresh installation. If you are tightening up a database that is in use then you can do this on a database by database case (using a SELECT statement to identify all the effected databases and where condition to restrict the delete statement).
Removing Permissions from a User
Permissions may also exist in the db.User table that are too open for our liking. This can be tested for again using a select statement checking for blank users and wild-carded hosts.
mysql> SELECT user.Host, user.User
    -> FROM user
    -> WHERE ((user.Host = "%") OR (user.User = ""));
+-----------+-------+
| Host      | User  |
+-----------+-------+
| %         | keith |
| localhost |       |
| myhost    |       |
+-----------+-------+
3 rows in set (0.03 sec)
Generally there are localhost and the hostname of the machine (myhost in this example) with blank entries and there maybe other un-needed entries such as the remote keith user. If we are happy to delete all these users another statement will do so.
mysql> DELETE FROM user
    -> WHERE ((user.Host = "%") OR (user.User = ""));
Query OK, 3 rows affected (0.02 sec)
FLUSHing the Privileges.
Finally to ensure that these changes take effect we have to FLUSH (reload) the privileges
mysql> FLUSH PRIVILEGES;
Query OK, 0 rows affected (0.04 sec)
...and that is the database more secure than it was and you can now be confident that the only accounts on the server are ones that you have created. If you have no need for remote connections to your database it might also be work firewalling the port 3306 which the MySQL server listens on for incoming requests.
Using MySQL with MS Access
Requires knowledge of database admin.
Another often asked question is how to connect MS Access to a MySQL database. The key to this is using ODBC. This allows users who are more familiar with the Access interface to still use the open source and free database on the back-end. To achieve this there are several steps:
- Install the mysql driver on the windows machine
- Set up a DSN Connection on the local machine
- Link to the database tables
Installing the MyODBC Driver
The MyODBC driver (also known now as Connector / ODBC) can be downloaded from the MySQL site and is fairly easy to install. Unzip the file to a temporary directory and run SETUP.EXE which will start the install.
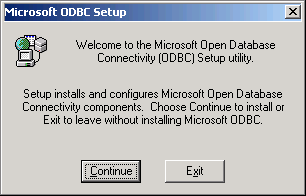
Click the continue button and you will be prompted to select which drivers you wish to install.
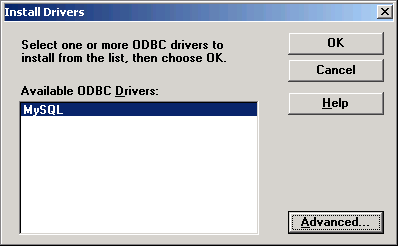
Select MySQL and then Press OK to continue. The drivers will be installed and you will be prompted to setup the data sources.
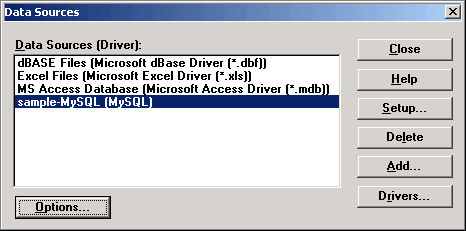
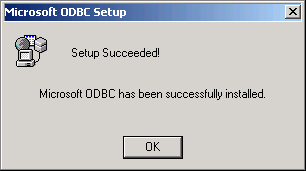
Just press Close and finish the installation.
Setting up a DSN
These instructions are for Windows 2000 and XP. Older versions of Windows will have different methods for setting up the DSN, but there are plenty or resources elsewhere on the Net.
The method for connecting to a data source on windows is via ODBC which allows us to create a connection to a database (details of the machine, username password and anything else about the connection are stored automatically) and stored in a Data Source Name or DNS. There are three types of DSN:
- User DSN - A connection is stored specifically for the user that is logged in.
- System DSN - A connecti0n is stored system wide and is available to all users.
- File DSN - the details are stored in a file and can be transferred from machine to machine.
We will set up a System DSN so that even when no-one is logged on we could still use this DSN remotely (if we wanted). First we need to start the Data Source Administrator which can be found under:
Start / Settings / Control Panel / Administrative Tools / Data Sources (ODBC)
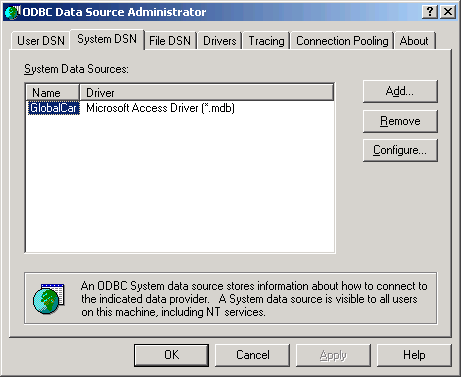
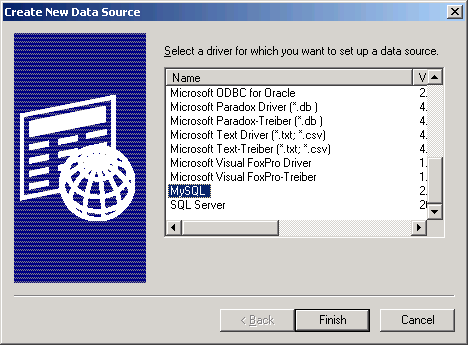
If you select the system DSN (there may be other data sources there installed by other software) and then click Add. This will bring up a dialog box asking us to choose a driver. Scroll down and choose the newly installed MySQL driver.
Clicking finish will bring up a dialog box which asks for the details of the mysql database to connect to. In this example I'm using the vworks database from earlier workshops, calling the DSN vworksDSN and connecting to an IP address of 192.168.0.1 (a fictional machine on behind a NAT). If the MySQL server is on the same machine that you are planning to Setup the DSN on then you could use localhost or the 127.0.01 IP.
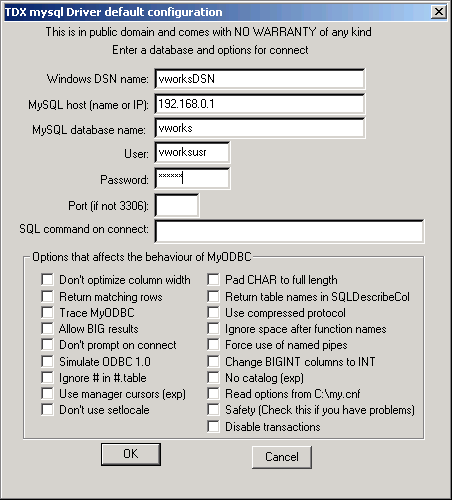
There are obviously more options that you could use (the tick boxes) but these aren't necessary to get things working. Click OK and the connection has been made and should appear under the System DNS tab. You can now also click OK to close the Data Source Administrator program.
Setting Permissions on the database (optional)
If the MySQL database and the DSN are on the same machine, chances are that the MySQL database will have already been configured to accept connections from the localhost and nothing needs to be done at this stage. If they are on different machines then we have to set permissions for the PC with the DSN to connect to the MySQL database. We will use another machine behind the NAT for the DSN machine - 192.168.0.2. Login as the admin user to your MySQL database and issue a GRANT statement (see Part 6 for more details) that has restrictive privileges.
mysql> GRANT SELECT,INSERT,UPDATE,DELETE
ON vworks.* TO vworksusr@192.168.0.2
IDENTIFIED BY 'newpassword';
Connecting from Access
Open MS Access and create a new database. You will then be faced with the default database dialog box from which you can make tables, forms, queries reports etc.
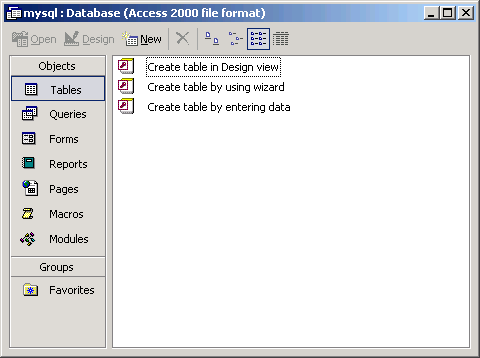
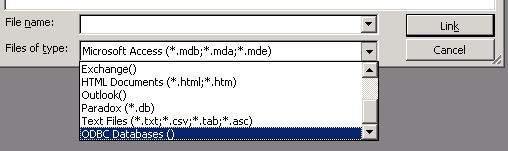
Rather than create a new table we are going to link to the MySQL database via ODBC. So click New then choose Link Table and click OK. A dialog box will then appear asking us to choose a file to link to. We don't want a file so instead choose ODBC Databases from the 'Files of Type' dropdown menu.
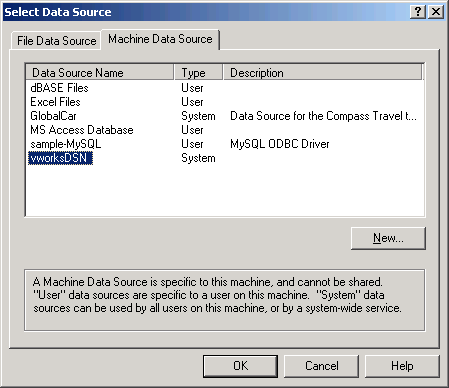
This will launch a new window asking you to Select Data Source. Make sure that the Machine Data Source tab is selected and you should see the vworksDSN that we created earlier. Click OK and you should be prompted for which tables you want to link to.
IMPORTANT: If you have not set up the permissions on the database correctly you may see the MySQL configuration box pop-up. This will also now display the error message from the server:

Next we gave the simple matter of choosing the tables we wish to import (i've included a few other tables to ignore).
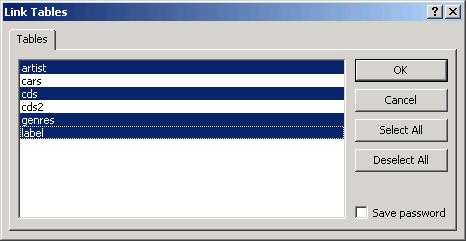
Press OK once more and the tables will appear in the database as with other local tables ready for normal use. It might be a good idea to define relationships between the tables at this point to use MS Access to force database integrity, but I'm not going to cover that here.